

DIY Leather Shoe Repair
To be completely honest, up until the time I owned a pair of steel toes from EMMA (Martino), I really didn’t put too much thought into keeping my steel toes looking good. After all, they were meant to serve a purpose and if they looked beat up, oh well. This was my thought for a long time, until I came across the business line from EMMA Safety Footwear. These shoes are different. They not only do a great of protecting my feet, but they look awesome doing it. So I felt it necessary to learn about leather shoe repair to maintain them.
There are shops out there practicing the time honored tradition of shoe repair, and I have no doubt in their ability to do a wonderful job at their craft. As an admitted DIY’er though, I wanted to see what I could do myself. From a little online research I found that simple repairs weren’t overly complicated so decided to give it a try.
It turns out that with a few simple supplies you can take a pair of scuffed up shoes and bring them closer to looking new again.
These are steel toes after all, so they were bound to get some scuffs and unfortunately the occasional gouge. Here are how my shoes looked before starting my repair efforts.

Before – Right 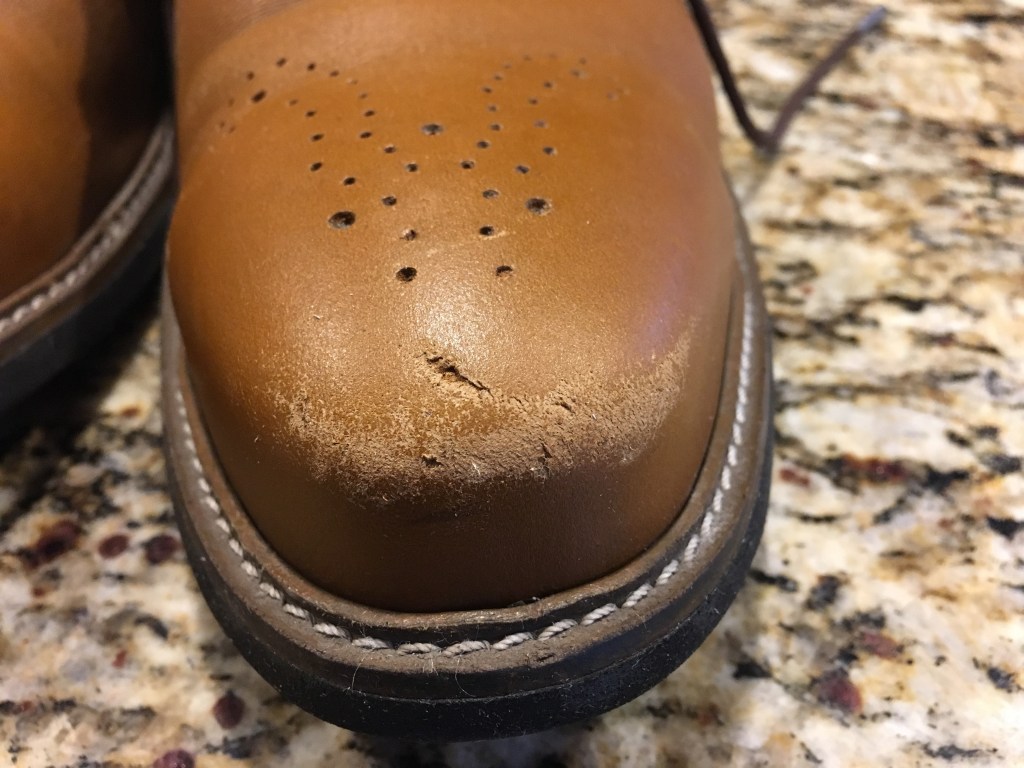
Before – Left
Supplies Needed
- Fine Grit Sandpaper – 400 grit worked well
- Super Glue (to repair gouges)
- Toothpick (to repair gouges)
- Shoe Polish
- Cloth Rag
Getting Started
Take the sandpaper and gently rub the scuff marks until they’re smoothed out. You want to do a little at a time and check the results frequently to make sure you’re not taking off too much. It was a little scary taking sandpaper to my shoes, but it really wasn’t too bad once I started.
If you have a gouge that leaves a flap of leather like I had, add a little super glue to a toothpick and apply the superglue into the gouge. Then press the flap closed with the other end of the toothpick to keep it in place while the glue sets up.
Once the glue dries you can hit the gouge again with a little sand paper to smooth it out. This step didn’t work too great for me, as the flap wanted to open up again. Maybe with a little practice I could master this, but it still looked a little better than it did originally.

In-Process – Right 
In-Process – Left
Finishing Up
At this point I was beginning to question my decision to tackle this myself because, while smoother, I actually had more scuffs on my shoes than before I started. Then the magic happened. Applying some shoe polish with a rag was nothing short of remarkable. One coat & it looked really good, and after letting it dry a few minutes and applying a second coat the shoes looked even better.

After – Right 
After – Left
Now I touch them up with a little shoe polish every once in a while to keep them looking good, and I have the confidence to tackle leather shoe repair if I ever need to!

